Through the computer and mobile client software of “NetEase Mail Master”, you can log in to your Google email account to receive, view, and send Gmail emails without scientific Internet access
The following is the process of registering a Google Mail account through the NetEase Email Master client on a Windows computer.
The entire registration process does not require scientific Internet access, and NetEase Mail Master will automatically connect to Google servers.
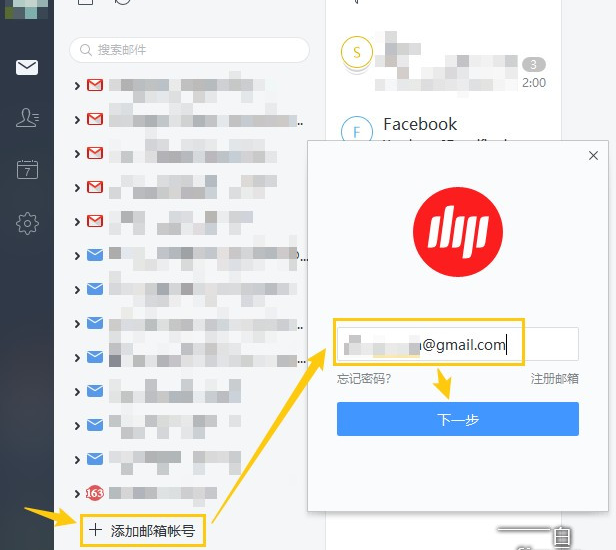
First, click “Add Email Account” in the NetEase Email Master software, enter the Gmail email address to be registered, and then click “Next”, as shown in the figure below:
Next, enter the new Google email account to be registered again, and it will show “Your Google account cannot be found”, indicating that this account has not been registered, then click “Create account”, as shown in the figure below:
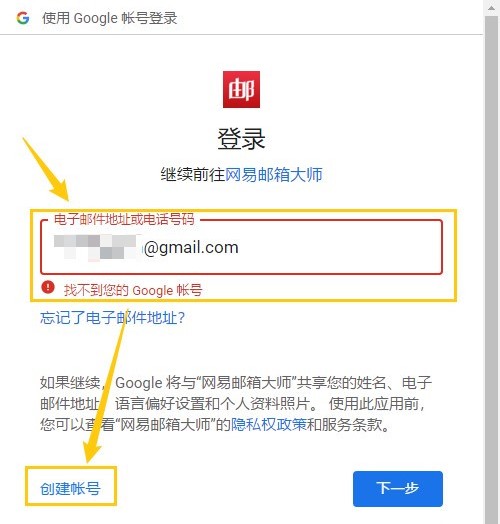
In fact, in the previous step, when entering the “Sign in with Google account” interface, you can directly click “Create account” to enter the next step.
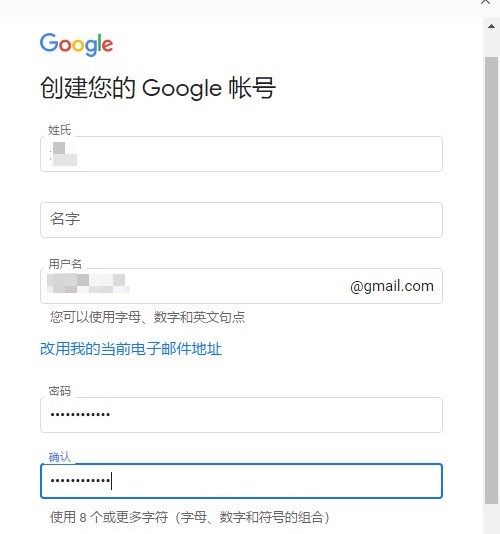
Next, it is the “Create your Google account” interface, enter your name, username (that is, the new Gmail account), password, and then, pay attention, scroll the scroll bar on the right a little to see the “Next” at the bottom, click the scrolling “Next”, as shown in the figure below:
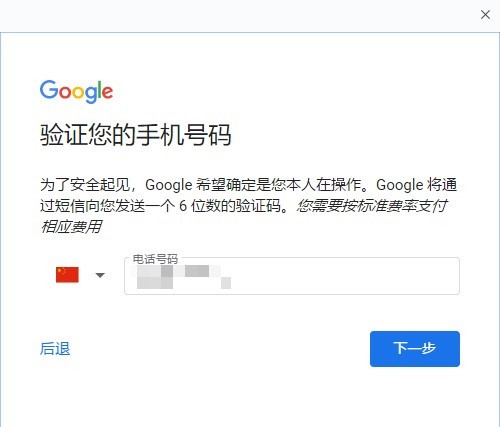
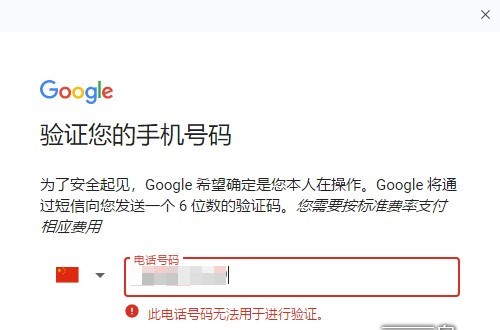
Next comes the key to verifying your domestic mobile number, “Verify your mobile number For security, Google wants to make sure that you are doing it. Google will send you a 6-digit verification code via text message. You will be charged at the standard rate.”
Enter the commonly used mobile phone number, the domestic mobile phone number can be used, click “Next”, as shown in the figure below:
Tragically, “This phone number cannot be used for verification.” As shown in the figure below:
At this time, you can go to the NetEase email master of the mobile app and try it. will give you unexpected surprises